
In this guide we'll cover two ways to do it. Method 1 is the fast lane: use an app called Chatmake and have your bot running before your coffee gets cold. Method 2 is the DIY route: build it yourself with tools like Lovable or Claude Code. We'll walk through both so you can pick the one that fits your situation.
Let's start with the easy way.
Method 1: Use Chatmake (the easy way)
Chatmake is an app that does exactly what the title of this article promises. It lets you create a ChatGPT-style bot trained on your business info, with a branded chat page you can share as a link. No coding, no hosting, no API keys to deal with. The whole thing happens on your phone.
Here's how to set it up in five steps.
Step 1: Download Chatmake
Chatmake is available on the App Store for iPhone and iPad (Android is on the roadmap). Download it and create a free account. The free plan includes 10 conversations per month, which is enough to test everything out.
One thing that might surprise you: the entire setup happens on your phone. There's no web dashboard you need to log into on your laptop. Just the app.
Step 2: Configure your chatbot
This is the most important step. You're basically teaching your bot what it should know about your business.
First, give your chatbot a name. Something that fits your brand. If you run a ceramics shop called Luna Ceramics, maybe call it "Luna's Assistant" or just "Luna".
Then set the tone of voice. Do you want the bot to sound professional and formal? Friendly and casual? This sets the personality for how it talks to your customers.
You also get to pick your AI provider. Chatmake lets you choose between three engines for your chatbot:
- OpenAI (GPT)
- Anthropic (Claude)
- Google (Gemini)
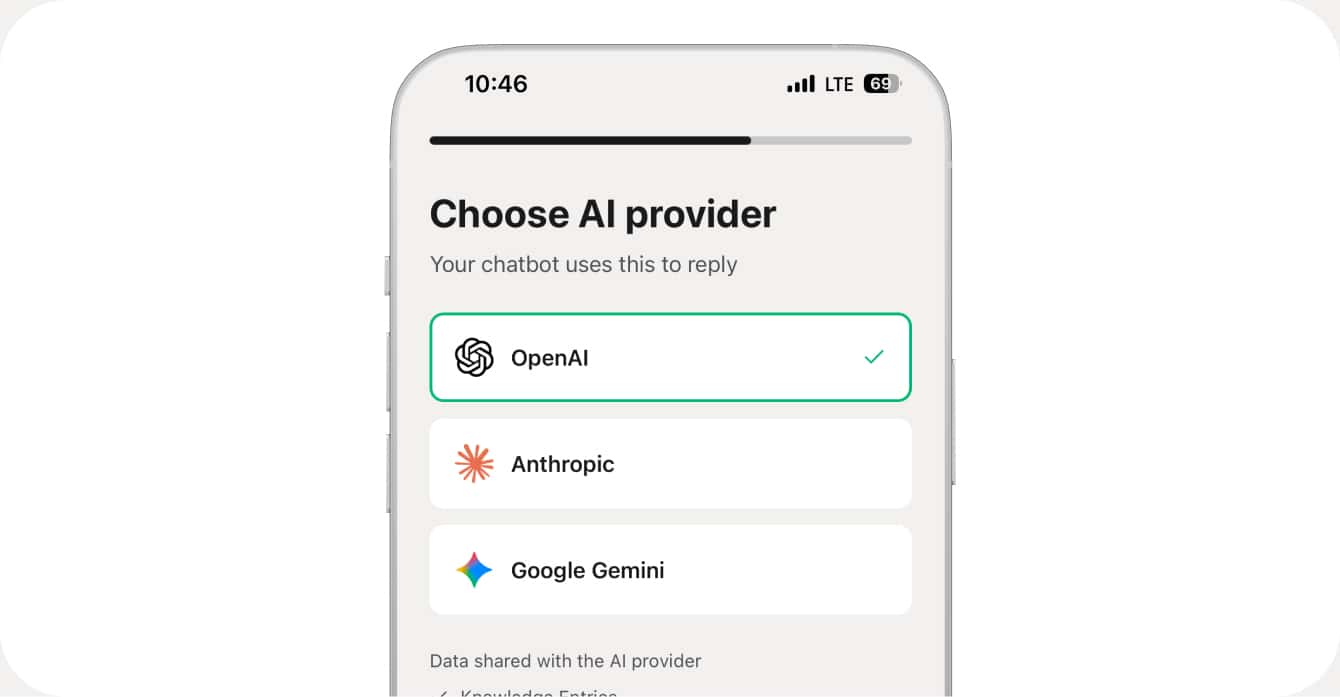
Each has slightly different strengths, but for most businesses any of the three will do a great job. You can always switch later if you want to try a different one.
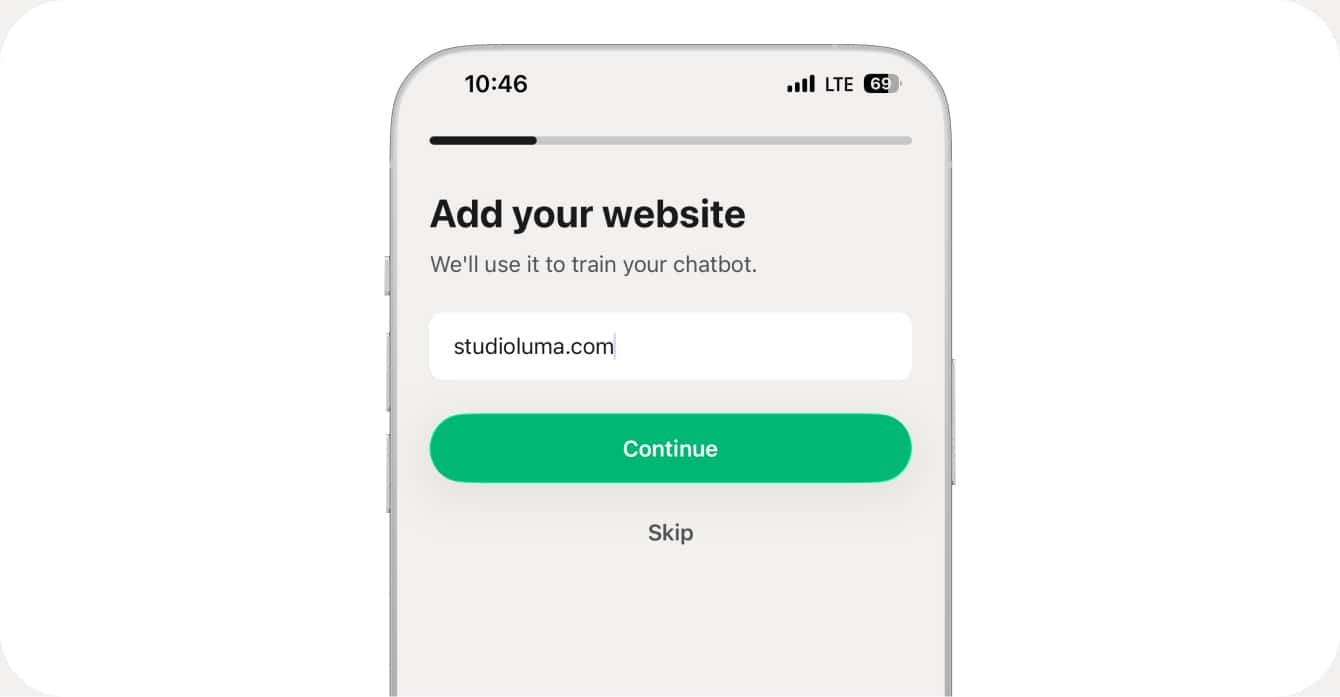
Now the real work: adding your knowledge. You have two options here. You can type it in manually, covering things like opening hours, pricing, services, FAQs, your return policy, or anything else your customers tend to ask about. Or you can paste your website URL and let Chatmake import the content automatically. It pulls out the important info so you don't have to copy-paste everything yourself.
Here's the key thing: the bot ONLY answers based on what you give it. It won't make stuff up. It won't go off-topic. If someone asks a question you haven't covered, the bot says it doesn't know. And if you turn on human handover, you get a notification and can jump in yourself.
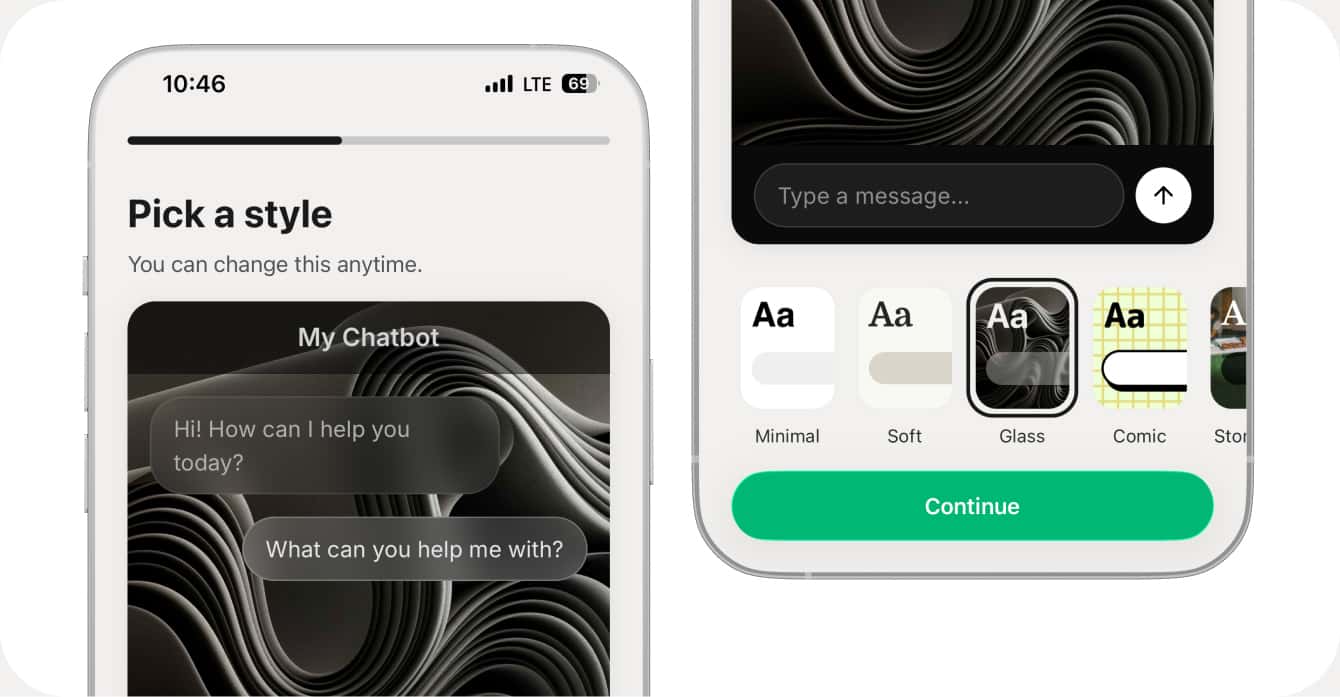
Step 3: Design your chatbot website
Unlike most chatbot tools that give you a small widget in the corner of your website, Chatmake gives you a full chat page. It's basically a mini website dedicated entirely to your chatbot.
You can customize the colors, bubble styles, wallpaper, welcome message, and company logo. Start from one of their templates or build the look from scratch. The goal is to make it feel like part of your brand, not some generic bot that could belong to anyone.
Step 4: Set your URL and share it
Every chatbot you create gets its own link at chatmake.app/your-name. Pick a slug that's short and easy to remember. Your business name usually works best.
Once you've got your link, put it everywhere:
- Your Instagram or TikTok bio
- Your website (as a button or link)
- Your Google Business Profile
- Email signatures
- WhatsApp messages or texts to customers
Anyone who clicks that link lands on your chatbot page and can start asking questions immediately. No app download needed, no login required. It just works in the browser.
Step 5 (optional): Use your own domain
If you'd rather have your chatbot live at something like chat.yourbusiness.com instead of the Chatmake URL, you can do that too. Either set up a simple DNS redirect from your subdomain, or embed the chatbot on your existing website using an iframe. Both options keep the branded design you built in Step 3.
So to sum up Method 1: all you need is your phone, it takes about 10 minutes, and it's free to start with 10 conversations per month (Pro unlocks unlimited). No technical skill required. You walk away with a branded AI chatbot website and a shareable link.
Method 2: Build it yourself (the DIY way)
If you're more technical, maybe you're a developer, a vibe-coder, or just someone who likes tinkering, you can build your own ChatGPT-style bot from scratch. This gives you full control over everything but it takes more time and some technical knowledge.
Here are two approaches depending on your skill level.
Approach A: Vibe-code it with Lovable
Lovable is an AI-powered app builder. You describe what you want in plain English and it generates a full web application for you. So you can literally tell it to build you a chatbot website.
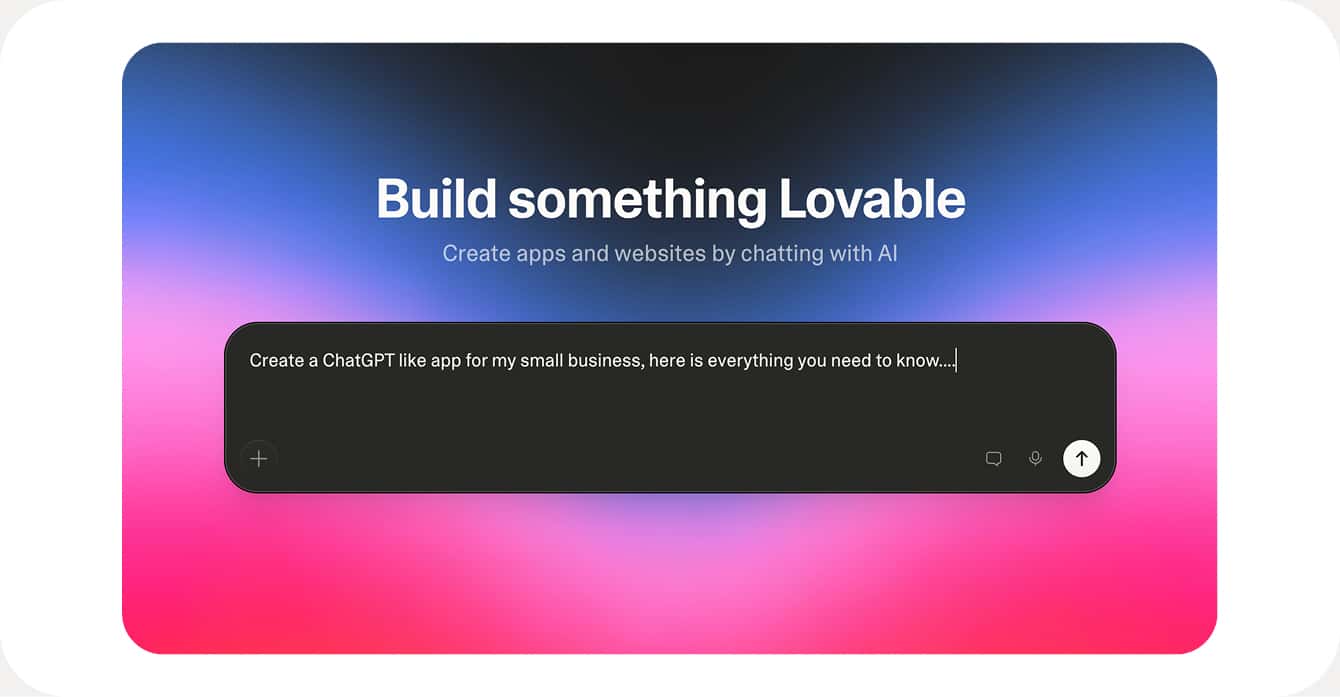
Here's an example prompt you could use:
Build a chatbot website for my ceramics shop "Luna Ceramics".
It should have:
- A clean chat interface with my brand colors (#2D5A3D and #F5F0EB)
- A welcome message: "Hi! I'm Luna's assistant. Ask me anything about our ceramics."
- It should use OpenAI's chat completions API to answer questions
- The system prompt should include this knowledge: [paste your business info here]
- A simple, mobile-friendly design
Lovable will generate the frontend, hook up the API calls, and give you something that works pretty quickly. You can then tweak the design, adjust the prompts, and deploy it to a .lovable.app domain or export the code to host it yourself.
There are a few things you'll need to sort out on your own though. You'll need an OpenAI API key, which costs roughly $0.01 to $0.05 per conversation depending on the model you use. You'll need to handle hosting (Lovable helps here, or you can use Vercel or Netlify). And your knowledge lives in the system prompt, which works fine if your business info fits in a few paragraphs but gets unwieldy if you have a lot of content.
What if you have a LOT of knowledge?
If you're trying to feed in dozens of pages, a full product catalog, or your entire website, stuffing it all into a system prompt won't work. The model has a context limit and the quality drops when you overload it.
The solution is something called RAG (Retrieval-Augmented Generation). The idea is simple: you take all your documents, split them into small chunks, turn each chunk into a numerical representation (an "embedding"), and store them in a vector database like Pinecone, Supabase with pgvector, or Chroma.
When a customer asks a question, the system first searches your vector database for the most relevant chunks, then sends those chunks along with the question to the AI model. That way the model always has the right context without needing to hold your entire knowledge base in memory.
It's powerful, but it adds real complexity. You're now managing a database, an embedding pipeline, and the chat interface. For most small businesses this is overkill. But if you're building something bigger or more specialized, it's the right approach.
Approach B: Full code with Claude Code or Cursor
For developers who want complete control over every line of code, you can build the whole thing yourself. Here's a typical stack:
- Frontend: Next.js, plain HTML/JS, or whatever you're comfortable with
- AI: OpenAI API or Anthropic's Claude API
- Knowledge: System prompt for small, RAG with a vector database for large
- Hosting: Vercel, Netlify, or any provider you prefer
A minimal implementation is surprisingly small. You need a chat UI (maybe 30 lines of HTML), an API route that takes the user's message and sends it to OpenAI along with a system prompt containing your business info, and a way to display the response. Deploy it to Vercel and you're live.
Here's a simplified example of what the API route looks like:
import OpenAI from "openai";

const openai = new OpenAI();

const SYSTEM_PROMPT = `You are a helpful assistant for Luna Ceramics.
Only answer questions based on this information:

Opening hours: Monday to Friday, 8am to 4pm
Location: 123 Clay Street, Portland
Products: Handmade ceramic bowls, mugs, and vases
Prices: Bowls from $35, mugs from $25, vases from $60
Returns: 14-day return policy for unused items

If you don't know the answer, say so politely.`;

export async function POST(req) {
  const { message } = await req.json();

  const response = await openai.chat.completions.create({
    model: "gpt-4o-mini",
    messages: [
      { role: "system", content: SYSTEM_PROMPT },
      { role: "user", content: message }
    ]
  });

  return Response.json({
    reply: response.choices[0].message.content
  });
}
This works great for a small knowledge base. If you need RAG for larger amounts of content, you'd add an embedding step with OpenAI's embeddings API and a vector store like Supabase. There are plenty of good tutorials out there for this, so I won't reinvent the wheel here.
To sum up Method 2: you'll need a computer, API keys, and some technical know-how. Setup takes anywhere from a few hours to a few days depending on complexity. Cost is roughly $0.01 to $0.05 per conversation in API fees, plus $0 to $20 per month for hosting, plus your time. You get full control, you own the code, and you can customize everything.
Chatmake vs DIY: which should you pick?
Here's how the two methods compare. With Chatmake you're up and running in about 10 minutes, no technical skill needed, and the free plan gets you started. Knowledge management is built in (type it or import from your website), design is handled through templates and brand colors, and you get human handover, analytics, and hosting included out of the box. Updates and maintenance happen automatically.
With the DIY approach, setup takes hours to days and you need medium to high technical skill. You're paying for API costs plus hosting plus your own time. You handle the knowledge management yourself (either through a system prompt or by building a RAG pipeline), and you get unlimited design freedom since you're writing the code. But features like human handover, conversation analytics, hosting, and ongoing maintenance are all on you to build and manage.
For the vast majority of small businesses, Chatmake is the right call. You get a working ChatGPT for your business in minutes, it looks professional, and you don't take on any technical risk. If the bot breaks or needs updating, that's Chatmake's problem, not yours.
The DIY route makes sense if you're a developer who wants to learn how this stuff works, if you need deep integrations with your existing systems, or if you're building a product where you need full control over every detail. It's rewarding to build, but be honest with yourself about whether the time investment is worth it for your situation.
Frequently asked questions
Is this the same as a custom GPT in ChatGPT?
Similar idea, different execution. A custom GPT lives inside ChatGPT, which means your customers need a ChatGPT account to use it. With Chatmake or a self-built chatbot, your bot lives on its own page that anyone can access without signing up for anything.
How much does it cost?
Chatmake's free plan gives you 10 conversations per month. The Pro plan unlocks unlimited conversations. If you build it yourself, expect to pay around $0.01 to $0.05 per conversation in API costs, plus hosting fees.
Can I train it on my entire website?
Yes. Chatmake can import content from your website automatically. For the DIY route, you'd scrape your site and either put the content in a system prompt (if it's small) or build a RAG pipeline (if it's large).
Will it make up answers?
Chatmake restricts the bot to your provided knowledge, so hallucination is minimal. If it doesn't know something, it says so. With a DIY build, you'd need to configure the system prompt carefully to get the same behavior.
Can I use it for customer support?
That's the main use case. FAQs, opening hours, pricing, service details, policies. Chatmake also has human handover for when the bot hits a question it can't answer, so your customers never hit a dead end.
Does it work on mobile?
The chatbot page works on any device with a browser, both desktop and mobile. Setting it up with Chatmake happens on your iPhone. DIY builds work wherever you deploy them.
Building your own ChatGPT for your business used to mean hiring developers and spending months on it. Now you can do it in 10 minutes from your phone, or in a weekend if you want to code it yourself. Either way, your customers get instant answers and you get your evenings back 📲